Gordon Cook
![]()
Gordon Cook |
|
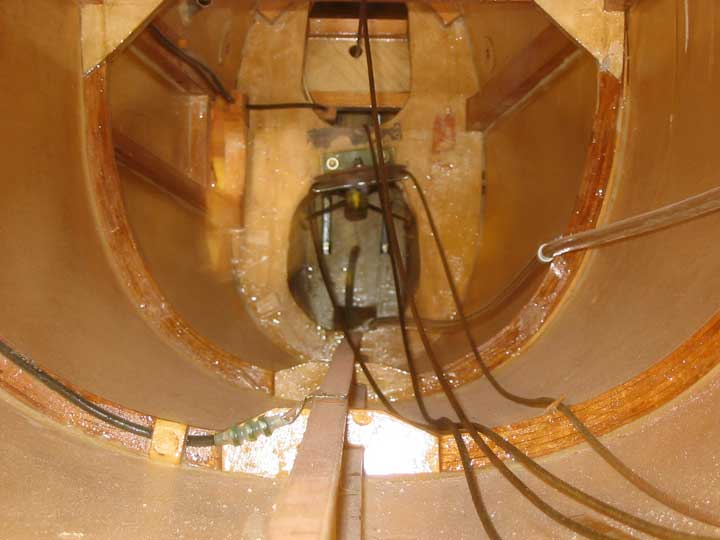
Inside the tail cone |
My job there was all-consuming so not much was done on the Falco during those five years. I was responsible for converting the area from electro-mechanical telephone exchange switching to the latest digital switching system. I did manage to build the fuselage frames, assemble the fuselage and wing and start skinning the fuselage. More marching orders, this time to Vancouver. This time the move of the project was more complicated since the parts where now quite a bit larger. The move of household effects was quite a bit simpler than the move of the partially built Falco since the company arranged everything, and we just stood back and watched. We moved into a home with a 1-1/2 car garage in Surrey about 10 miles SW of Vancouver. By this time I had moved the project to a school in Langley that had an aviation maintenance class. They were glad to have it for the experience of working on wood airplane and promised that no work would pass unless thoroughly inspected by the instructor. Words are cheap, there was a lot of damage to the existing structure and no progress made. I retrieved the project and moved it to my garage to which I had added a temporary 8’ extension and proceeded to remake the flaps and ailerons plus repair other damage done. |
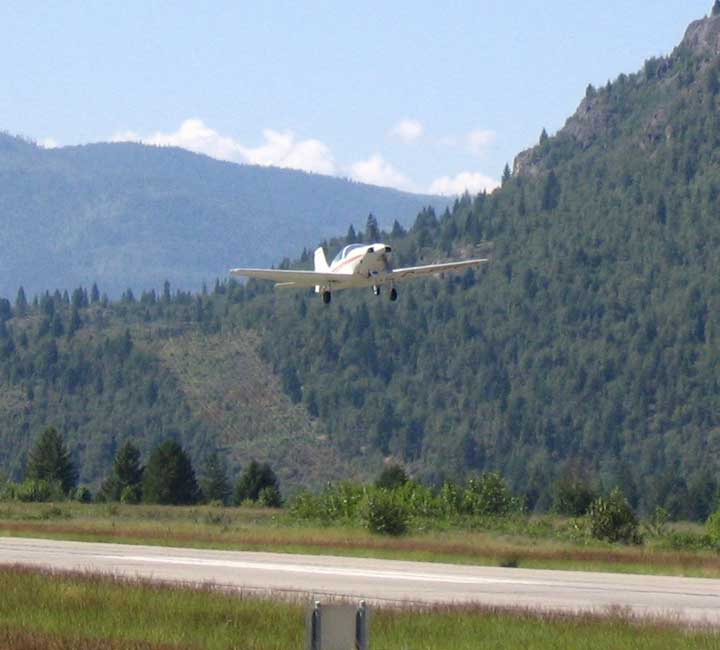
The first takeoff |
I got to the point where the wing and fuselage had to become one, so out came the tape measure to see if I could place the fuselage across the garage. Measurements showed it would fit, but it would be tight, up against the wall on one side and about a foot to spare on the other. The fuselage fit across the garage was so tight I had to crawl under it to get from one wing tip to the other. I had sore knees for quite a while from crawling on the concrete (how I envy those with adequate work areas!). I would have enough length, thanks to the extension, to fit the wing under the fuselage. The wing had already been skinned at this point, and there is an article in Sequoia’s Skunkworks under ‘bending wing skins’ on how I did this. I had help to place the wing on the floor under the fuselage. I did the actual fitting and gluing of the wing to the fuselage solo. To do this I attached a couple of cable hoists to the ceiling joists above the wing tips and lifted one end at a time until the wing mated with the fuselage. With everything lined up and leveled and location marked I lowered the wing. I then mixed a large pot of Industrial Formulators epoxy (the glue Transport Canada recommended and similar to the West System epoxies) and applied it to appropriate places on the wing and fuselage. I lifted the wing with the cable hoists into place, lined up the location marks, clamped and got out of the garage. I have found that when working in a tight location that it’s better to vacate it after a large glue job rather than look for something else to do. It’s too easy to bump something and screw up the glue job. Next came the cutting of the fuselage into two pieces. With that done I hung the fuselage up to the ceiling joists on one side of the garage and flipped the forward fuselage and wing over and skinned the bottom. Rob Carey, a sheet metal man from Air Canada and mentor from my Gibson’s days, showed me how to vacuum-bag fiberglass parts using sheet plastic, a vacuum cleaner, glaziers tape and the usual vacuum bagging supplies such as peel ply and soaker cloth. We fabricated the main wheel well doors, and I later fabricated the main gear doors. I then glassed the bottom and prepared it for painting, or at least I thought I had. It seems my painter had other thoughts, and I spent weeks resanding and filling my 747 Falco... well, a Falco isn’t as big as a 747 but it sure seems like it while lying on your back sanding the underside of the aircraft. Care has to be taken not to damage the thin layer of fiberglass. It’s easier to prepare the bottom when it’s upside down than when it’s right side up! |
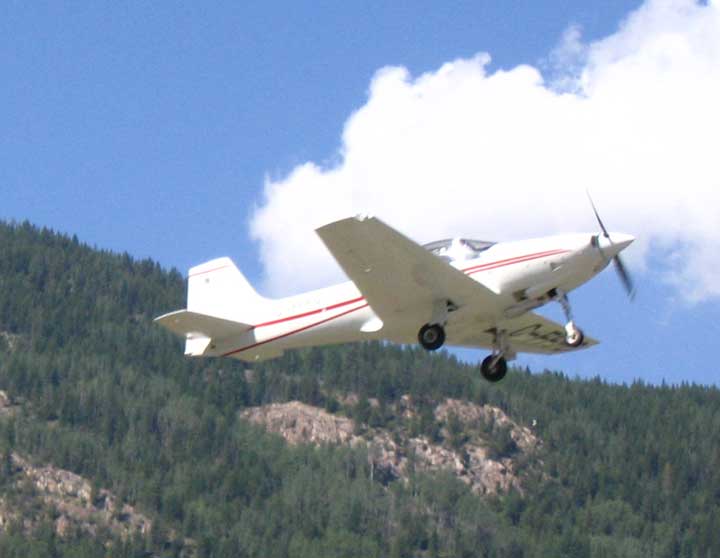
The first landing |
In 2000 I attended my first Falco fly-in. I went up a couple of times with John Harns and after that flight I knew I had chosen the right airplane to build, even though it’s probably one of the most complex of the homebuilts. Of course John can make any airplane look good. He let me take the controls for a few minutes and if it behaves well for me flying it, and it did, then it’s got to be good. One of the builders at the fly-in had moved his battery forward from the original location to under the floor aft of frame 6, so that’s were mine ended up. I then extended the original battery box right across the fuselage and will use it for survival equipment. There were several times when the wing, fuselage, etc. had to be moved, turned over etc. and I have a secret for doing this. It’s called beer. It was the currency of the neighborhood in Surrey. It was never dispensed before, only after the job was done. In all fairness they would have been glad to do it without the beer, but there was always a little social time after the job was done. Great neighbors! During my time in Surrey I retired from BC Telephone and since our kids had all moved from the Vancouver area and were scattered between Alberta and Northern BC and because real estate prices had gone crazy in Surrey we decided to take our equity and run. We moved to a small community just East of Trail were my wife and I have friends. There is an article on our move from Surrey to the Trail area on Sequoia’s website. Again, the move of household effects was nothing compared to the move of the Falco to its new digs at the Trail airport where it is housed next to where Dan Martinelli’s Falco is under construction. Trail seems to be an active center when it comes to homebuilding. There are two Falcos, one immaculate Steen Skybolt and three Spencer Air Cars either completed or under construction. Not bad for a community of about 10,000 people. |
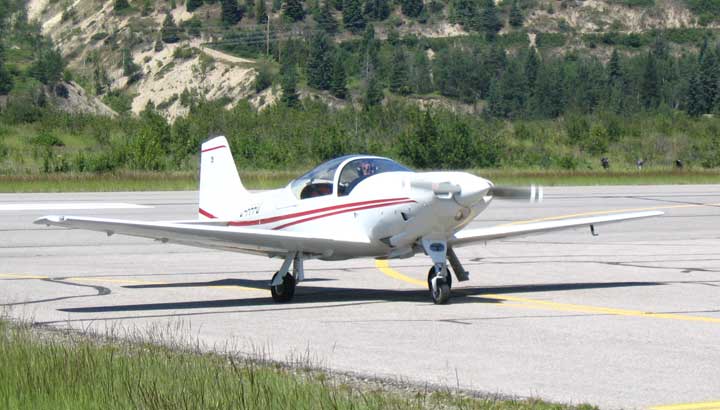
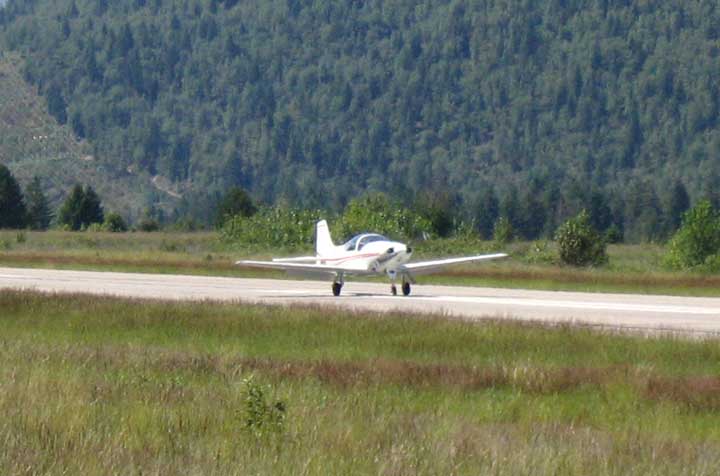
Taxi in, test flight complete |
Since arriving here I’ve reassembled the aircraft, finished the panel and installed it, and had the aircraft painted. The panel has two attitude instruments, one vacuum and one electric, a Becker radio and transponder pair, voltmeter, an EI SR8A Smart Engine Analyzer and an EI Fuel Flow. The altimeter is an encoding type and so far seems to be working well with the Becker transponder. The other instruments are from the Sequoia instrumentation package. A Garmin 196 fills out the instrumentation. I’ve fastened a mounting bracket on the panel for the GPS that I think will work well. The homebuilder who first said, “It’s 90% complete with 90% to go”, knew what he was talking about. I thought I’d be ready to fly last September, but because of numerous problems it’s only ready now, June 2006. One of the most frustrating snags was the faulty gear retraction system, or at least it seemed as though it was faulty. The mechanical part was fine, but the relay control wasn’t functioning. The voltage drop across the pitot relay was only 3.5 volts, obviously not enough to operate it so the first suspicion was the power transistor. After checking the wiring and finding it okay I took out the transistor and checked it with the diode checker on my meter. It tested okay, but I wasn’t happy with the finding because everything pointed to the transistor, especially after I jumpered between the collector and emitter points on the transistor jack and the relay system worked and the gear went up and down. |
![]()
![]()
|
|
Go back to Gordon Cook