Bending the Wing
Leading Edge Skins
![]()
Bending the Wing
|
|
by Bob Brantley
This appeared in the June 1995 issue of the Falco Builders Letter. |
When I skinned the top of the wing panels, I departed from the system described in the construction manual. I had such good luck with skinning the stabilizer and vertical tail with the method used by Craig Bransfield that I felt it should also be used on the wing.
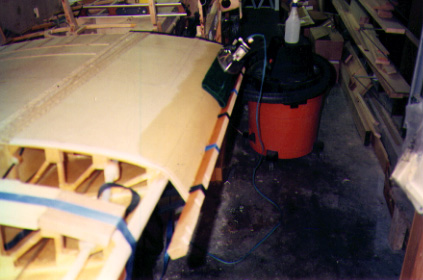
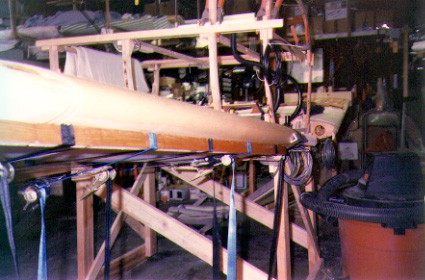
After all of the bottom wing skins were glued in place, I removed the wing from the vertical position and placed it in the horizontal position-making sure to level it in both directions and jig in the proper amount of wing washout. I glued two-by-fours to the cement garage floor with construction adhesive, and attached the jigs to these with drywall screws to prevent any movement of the jigs after the alignment was made.
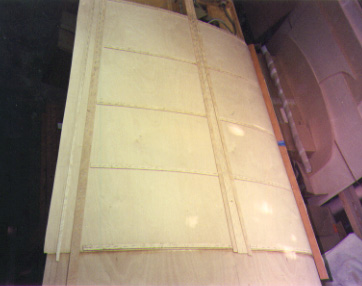
The plywood skins were cut to proper width and a 3/4"x1" piece ripped from 1"x6" fir was glued to the front edge of the top side of the skin.
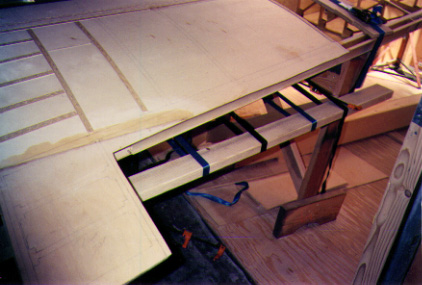
Five elongated holes were cut to correspond to the wing rib spacing to allow the passing of the webbing from web-style hold-down clamps. These clamps have a ratchet that will pull up the nylon webbing tight and are used as tie-downs for pickup trucks. I found them in my local hardware store, and they have been invaluable for odd clamping jobs.
The skin was glued and clamped, except right at the leading edge of the wing. After the glue had dried, I removed the tack strips from the leading portion of the rib area and installed the web clamps around the front of the skin, over the 3/4"x1" board, and around a stout 2x4 across the rear of the wing jig and fuselage jig.
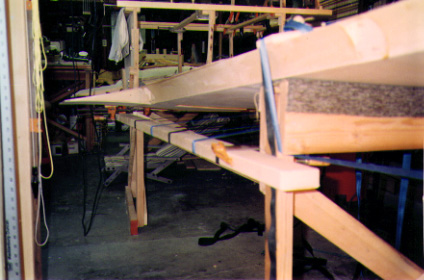
Using a wet towel and steam iron, I proceeded to steam the leading edge of the skin until it started to bend around the leading edge of the wing. Once the skin starts to become pliable, start tightening the web clamps to apply pressure and continue until the skin wraps completely around the leading edge. It took me about an hour to steam the 2.5mm inboard skins and 40 minutes on the thinner 2mm outboard skins. The number of plies of the wood can make a big difference in the amount of time it takes to steam the bend in the plywood.
You need to let the skins dry completely for two or three days before it will hold the rounded shape of the leading edge. To glue the skins, just remove the clamping pressure, pry back the skin, force glue between the skin and the leading edge strip, and re-apply the clamping pressure. I used a 2" paint brush and epoxy glue for this operation just in case there were any gaps to be filled. After the glue has dried, remove the web clamps and use a razor saw to remove that portion of the extra wing skin with the 3/4"x1" board attached, and sand to blend to the bottom skin.
One nice thing about this method is that the bending jig is the wing frame. That is already made, and since you bend the skin around the piece that it is glued to, the fit is perfect.
![]()