My Falco Story |
|
This article appeared in the June 2006 issue of the Falco Builders Letter. |
by Neil Aitkenhead
Following a number of years of boating and yachting my interest in flying started with training in C152’s at Ardmore, Auckland, New Zealand in the early 80’s. After achieving my unrestricted PPL, I used to hire C172’s for local flights around the North Island of New Zealand. At that time having business interests at various locations in NZ I decided to buy my own aircraft. Having trained in Cessnas the natural progression was to a larger Cessna aircraft deciding on a CT210N that was sourced in, and ferried out, from Texas.
In ’89 I migrated permanently to the Gold Coast in Queensland, Australia, and I joined the Southport Flying Club which, for Australia, is a unique private club for aircraft owners situated in the midst of an environmental park on the Gold Coast. The Club currently has approximately 100 aircraft hangared at the licensed airfield comprising of single-engined fixed-wing and helicopters.
In earlier years the aircraft were mainly conventional Cessnas, Pipers and Beechcraft but in more recent years there has become a greater variety including sport, amateur built, aerobatic and vintage fixed wing plus a number of piston and turbine helicopters. Among the membership and staff there is a wealth of aviation experience both recreational and professional which is great moral support for a long term project. We flew the C210 over the Tasman Sea to Australia, and I continued to fly it in Oz for a year or so, including a two-week safari with the club around the top half of Oz, but as I did not have the businesses over here to justify the big thirsty high-maintenance machine. It had to go.
I continued a limited amount of flying with hired or borrowed aircraft but after a few “planeless” years I wanted to get back into my own aircraft again. Some of our club members suggested I just buy a little economic aircraft like a C150 or similar just to keep up my flying, but I knew if I did that I would soon be bored out of my brain with it. So I decided to look at the option of building something more my style, even though I knew it would be a long-term project. This was in the mid 90’s and at that time the few performance kit planes around were mainly composites which did not appeal to me. One of our club members had been to Oshkosh and brought back a coloured brochure on something called a ‘Falco’. At first I did not take much notice of it but another very experienced pilot member and friend, Doug Bruhn, said “if you want to build a ‘real’ aero plane, that’s the one for me.” He was familiar with the Zucolli Falco and suggested I go to Toowoomba and meet with Guido and see for myself. The wooden construction appealed having worked in wood for most of my life, boats, yachts, furniture, etc. plus the timeless lines and performance figures were to my expectations.
I introduced myself to Guido and arranged to drive up to Toowoomba to have a close look at a Falco. Guido and the family were very hospitable and unexpectantly Guido offered to take me for a fly with myself in the left hand seat. We went out for half an hour. He demonstrated the stalls, and we then we did a couple of circuits. I was sold even though the general consensus was “a fantastic aircraft, but don’t do it. It takes too long to build, too complex and too expensive.” I knew it would be a long term project so it would take more than these comments to put me off.
At this time the flying club was building more hangars at the field so I secured one of the 40’x 30’ units and started setting it up as a Falco workshop. Band saw, drill press, sander/lanisher, work tables, benches and various hand tools.
The plans were ordered from Sequoia and Falco S/N 1291 was started with the tail kits in April 1997. Actually the tail could boast to be the most traveled in the world, the kits dispatched from Sequoia by air freight went astray and finally turned up in Australia some weeks later after having been to Hong Kong and London! However apart from some minor damage with all the additional handling I was able to make a start.
After reading all the pros and cons of the various options I decided to use the West System epoxy throughout which I can say I have not regretted. It is very versatile and user-friendly as an adhesive, varnish, filler, glass cloth laminate etc.
Being still fully employed and with businesses to run, my time on the project had to be limited to an hour or two after work and hopefully a full day on Saturdays. I must say I have a very supportive wife Gwyn. Without this support and encouragement a project to the extent of a Falco would not be recommended. Many a visitor over the years have said I must have extraordinary patience to continue such a long term project. I don’t see it that way. I enjoy the work and treated each stage as an individual project.
I found the drawings and construction manual to be very thorough, accurate and complete. As this side of the world is generally metric, I had no difficulty with the drawings and measurements. The stabiliser, elevator, fin and rudder took the best part of the first year to complete.
Considering costs and shipping difficulties I decided to make my own wing spars. I bought the wing ribs and hardware kits from Sequoia and after researching costs and quality I decided to have the spruce graded and sized to my requirements by Perfectus Airscrew in Melbourne, Australia. A small business run by a gentleman that has been there for decades initially manufacturing wooden propellers. Having worked with timber most of my life I was very impressed with the quality and grading of the Sitka spruce from Perfectus. I was also able to procure locally the GL1 European birch aircraft plywood that is manufactured in Finland.
Laminating the wing spars was a project in itself. I set up a dead-level eight-metre table and, after lofting the spar shape onto the table, I screwed square blocks at every station to clamp the upper and lower spar laminates. By this time I had amassed a total of 55 clamps for the job and that’s not too many. I recall having to double up in places and bolting through the table to achieve a satisfactory and even clamping pressure over the eight metre length.
Most of my Falco was built to the older Amateur Built category which required a number of inspections along the way before closure of any part that could not be inspected after completion such as before closure of the spars, wing, etc. Over the years the Experimental category has effectively superseded the Amateur Built and so my Falco along with most sport aircraft recently built here are operating under the Experimental category.
The most intricate and exacting part of the project I found was the construction of the aileron/flap units being built with the washout and taper to match the wing. However if you follow the instructions and work to exact dimensions—and importantly have a good solid dead level set up table—it does all come together. By early 2000 I had the wing jigged up and ready to skin. The sanding of the wing ribs and spars to a fair surface before skinning is laborious and tricky job, using sanding boards of various sizes sanding across narrow delicate ribs and a wide spar cap.
In 2000 Gwyn and I made the pilgrimage to Oshkosh where we met Alfred, Susan and a number of North American Falcoholics who made us very welcome. We thoroughly enjoyed the experience both from a Falco point of view and recreational aviation in general. We incorporated a two-week driving holiday into our visit traveling back to the West Coast and home from San Francisco.
Over the years the project was interrupted by various other mundane tasks of building shop fittings and other cabinet work along with maintenance for our two ice-cream parlours that we owned over the period.
By 2001 I had laminated the fuselage frames and had the fuselage assembled with the wing and tail. Since I was building the aircraft at an airfield, I opted not to have the bolted joint in the fuselage at frame No. 8. Once all the upper and side surfaces of the fuselage were skinned, with several helping hands from the club the airframe was carried out of the hangar into the Queensland sun for the first time, and it did its first ‘loop’ and then returned to the hangar inverted. While upside-down I skinned all the undersurfaces and had it up high enough so I could walk around with head room in the cockpit area which made fitting a number of items easier. Before returning the airframe right way up I took the opportunity to prepare the entire underside right through to finished paintwork.
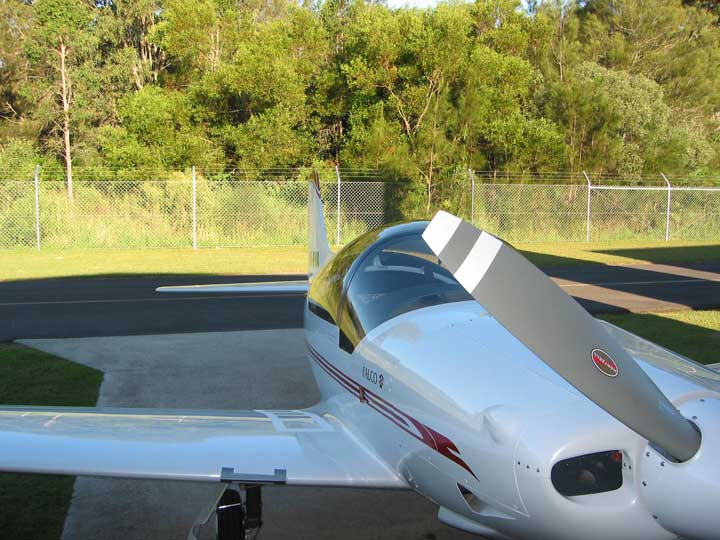
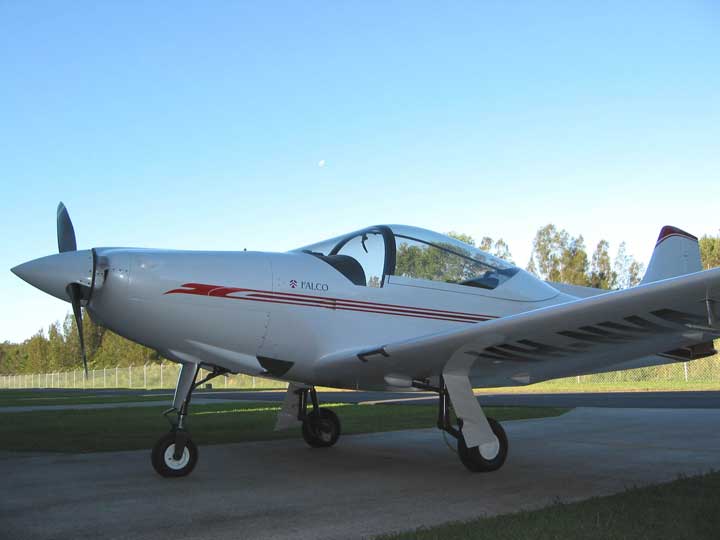
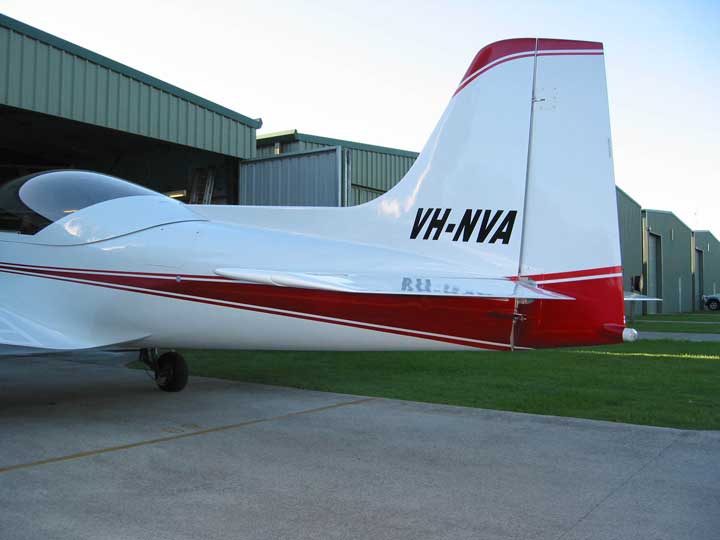
I have used DuPont’s Imron 6000 paint system. Since it will be operating generally in warm to hot conditions I decided against a ‘Ferrari’ red or similar dark colour that sucks in the heat but at the same time not wanting just plain white we chose a Silver Pearl White, so it has the DuPont epoxy primer, then the Silver White base, the Pearl and a clear top coat. The stripe system just recently added is two tones of a Mica Burgundy/Red.
![]()
|
|
Go back to Neil Aitkenhead