|
|
You can blend a point with a Bézier -- see example above -- a line with a polygon, a Bézier with a rectangle. The Blend tool works by making copies of the original objects, converts them to the same type of object (points, lines, rectangles, arcs, ellipses, polygons, B-splines, Béziers, etc.) and then blends those objects. The type of blending is shown as the title to the preview dialog box. Thus, if you are blending a point with a Bézier, the Blend tool creates a Bézier with all of its points at the same location. For Béziers of unequal size, the Blend tool distributes new points so that the blending Béziers will have the same number of points. The Blend tool can be used for many interesting graphic effects, but it also has some serious practical uses for drafting. Blending two points is a simple way of distributing a number of points equally between them. Blending two line-type objects is a way of finding the mean line of the two objects-for the mean line of an airfoil, for example. You can blend lines, polygons or Béziers to create a hatching effect. The Blend tool can also be used for contour maps to create intermediate lines.
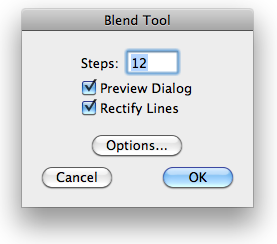
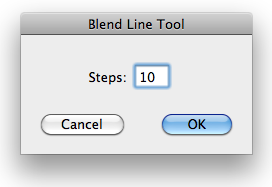
In the tool's dialog, type the number of steps in the blend. There must be at least two steps. You can type any number between 2 and 500. If you choose Preview Dialog, the full-blown Blend dialog will appear after you have selected the two objects to be blended with the mouse. For most simple blends, you don't need to preview the blend. Click the Options button, and the following dialog will appear:
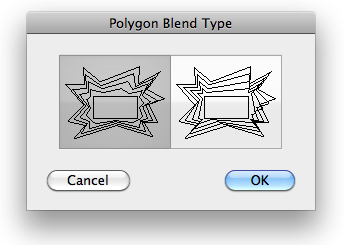
There are two methods of blending polygons with an unequal number of legs. In order to blend these objects, the Blend tool creates private copies of the original objects that have the same number of points. In the first method, the 'shorter' polygon has new points distributed along it. In the second method, the new points are placed at the vertices of the original polygon, for a 'bunched up' effect. To blend two objects, place the cursor in the drawing area on the first object and press the mouse button. Drag to the second object and release the mouse button. If the Preview Dialog choice is selected, the following dialog will appear:
The number of steps is shown, and you may change it. Type the number of steps in the blend-there must be at least 2 steps. You can type any number between 2 and 500. When you change the number of steps, the First Blend % and Last Blend % change accordingly. In the sample window, projection lines show the location of the first and last blends. Once you have set the number of steps in the blend, you may change the first and last blends. First Blend is the percentage of the distance between the selected objects where you want the first blend object positioned. Last Blend is the percentage of the distance between the selected objects where you want the last blend object positioned. For 'standard' linear blends, these percentages will fall between 0 and 100%, but they may be outside that range. Because polygons, B-splines (smoothed polygons), Béziers and lines all have a 'first point', the blending of these objects can sometimes produce unexpected results, which can easily be seen in the sample window of the dialog when the number of steps is more than 2. Click on the left-right arrow button to reverse the order of one of the objects. Arcs may also be reversed. Closed polygons, smoothed polygons and Béziers appear to the eye to be a continuous line, however they have a first point. To move the first point around the closed shape, click on the right and left arrow buttons to change this. The projection lines will show how the blend will be done. Click OK to dismiss the dialog. The objects will be blended.
In the tool's dialog, type the number of steps in the blend. There must be at least two steps. You can type any number up to 500.
To use the tool, place the cursor in the drawing area on the first object and press the mouse button. Drag to the second object and release the mouse button. The blended lines will be placed in the drawing. You may click on the side of any rectangle or polygon, and the two sides may be on the same object. |
![]()
Go back to WildTools