Gayl Boddy
![]()
Gayl Boddy |
|
|
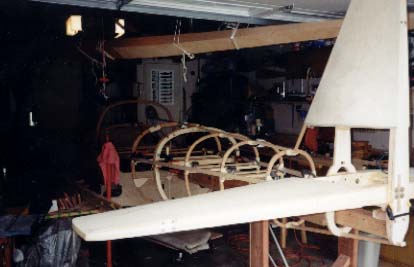
The fuselage goes together |

|
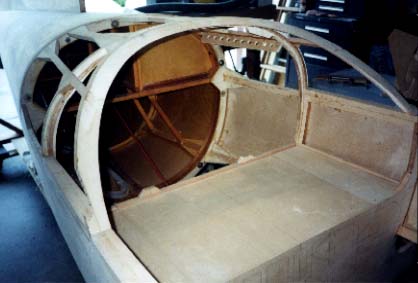
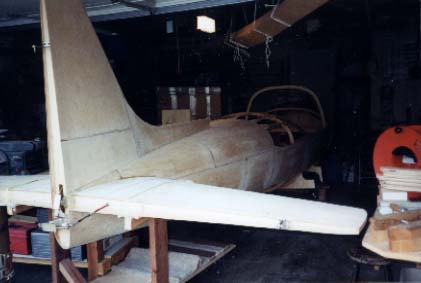
More fuselage construction I sent pictures of my Falco project, in February, which you put on your website. This is an update set. I took pictures of the project with the tail feathers on, before I started to do most of the skinning. The tail light is not in the rudder because I am waiting to get a tail light. I have the skin on, up to frame 3 on both sides. I soaked the skin from frame 8 to frame 6 and frame 6 to frame 3 for 24 hours each and used outside C-shaped clamps (the shape of the frames) at each frame. I let them dry 48 hours, then scarfed and final fitted them. They came out nice-meaning I am satisfied. I also installed the dorsal fin. I will be doing the standard canopy for head clearance. I have the baggage compartment and the battery compartment almost complete. The tail is varnished inside to frame 8. The exhaust ports are in behind frame 1. Per your request is a picture of this old man and his ship. I took the Falco on as a project, but Per Burholm says that it will soon be ready to fly. Then what? I have read the newsletters you publish, they make the project a lot easier. The construction manual and drawings are very complete and easy to follow. I have reviewed a lot of homebuilt aircraft drawings, and none is more complete than your Falco. I am an electro-mechanical designer and drawing checker by life-long trade. I started drawing "Corn Bore Sprayer Units" for Piper Cubs in 1949 and am still doing mechanical packaging drawings. I have seen a lot of drawings, and none are better than yours! -- Gayl Boddy |
|
Luggage compartment |
![]()
|
|
Go back to Gayl Boddy