Jeff Morriss
![]()
Jeff Morriss |
|

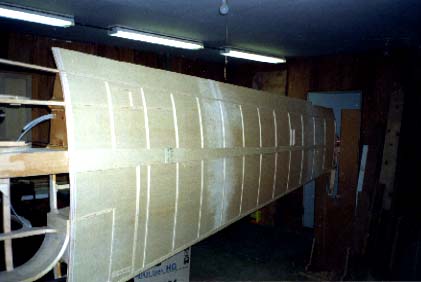
| In order to obtain the smoothest possible seams on the wing skins, I scarfed together three sections, (2.5, 2.0, and 1.5 mm thickness) into a continuous piece before gluing them onto the ribs. This particular photo shows the bottom wing skin tacked up for a test fitting before being glued. |
|
I knew that gluing the wing skins as one continuous piece would be a challenge, because Aerolite has a limited closed time. In order to minimize the stapling time, it was necessary to have everything that could be done ahead of time completed. This included taping all the gluing strips in place, using small dowels to precisely locate the skins, and having lots of staples handy to reload. I also chose a day when the temperature was low to give myself more time. I chose to apply glue to the spar and ribs and catalyst to the skins. I did not apply glue to the entirety of the leading edge -- only the rear half inch of the strip, because I planned to bend the leading edges after the skins were glued in place. The skins were hung in place and located by means of the wood dowels previously mentioned. Since the skin tended to be flat and the ribs curved, it was possible to avoid most premature glue-catalyst contact and give myself more time. Starting at the spar, I stapled like crazy from the center of the skin to each end of the spar. Then I did the same for the leading edge ribs, then for the trailing edge ribs, and finally for the rear spar and the leading edge. From start to finish the stapling process took 10 minutes and consumed over 500 staples. |
|
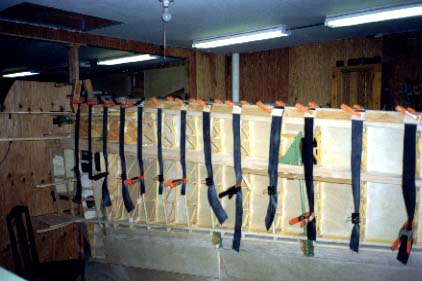
As can be seen in this Figure 16, I left about four inches of extra material on the leading edge. This was used to attach a 1x2 strip that held the leading edge plywood straight as tension was applied with large rubber bands (actually sections of truck inner tube). Bending the plywood -- especially the 2.5 mm stuff -- requires lots of patience. I found that soaking towels laid over and under the plywood and then heated with an iron worked well. Bending was a gradual process in which the rubber bands had to be periodically tightened. Once the desired bend was achieved, I left the bands in place and let the wing dry for 10 days. The Falco Construction Manual states that the original Falcos were built by stuffing glue under the previously bent leading edge. I found this procedure to be almost impossible. As an alternative, I drilled 1/8" holes at 2" intervals just through the plywood at the leading edge. I then modified one of those inexpensive grease guns by adding an aluminum plunger and an O-ring such that I could load the gun with Aerolite and inject it into the small holes under pressure. The gluing process consisted of squirting catalyst under the leading edge and then injecting Aerolite with the glue gun. When squeeze-out occurred, I knew I had enough glue. The process worked very well. In fact, I had to be careful to not overdo the injection process because the pressure out of the grease gun was sufficient to pop previous glue joints. Once the glue was injected, I then used nailing strips with 0.75" brads (staples did not provide sufficient holding power) to hold the leading edges in place until the glue dried. |
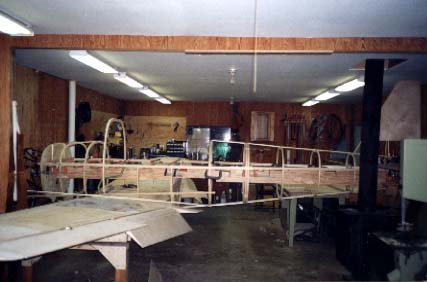
| Test fitting the fuselage frames with the wings. This is where it is really important to measure twice and glue once. I used plumb bobs, a water level and a 10-foot trammel board to make sure everything was square, level, and plumb. |
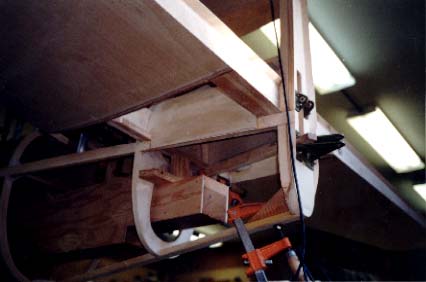
| Detail of the empennage to fuselage connection. I found it necessary to successively cut off sections of the fuselage jig I order to complete the glue-up of the longerons to the rear tail spar. |
![]()
![]()
|
|
Go back to Jeff Morriss