Autopilot Installation
![]()
Autopilot Installation |
|
by Drew Done
|
This article appeared in the June 2005 Falco Builders Letter |

When I had the grand total of 300 hours VFR experience, including around 50 in the Falco, I stupidly got caught up in a serious bout of must-get-home-itis. To add to the pressure, I had one of our kids onboard. This scenario finally put us above heavy cloud with failing light. Thank God for the GPS and the fact that we live on the coast—I was able to set us up inland from our town with a heading out to sea. This obviously got any potential mountains out of the way. After letting down through about 3000’ of thick cloud I admitted to my son that it was the first time and the last time that I had flown in that situation. Right then I convinced myself to put in an autopilot and also get some instruction in instrument flying.
Over the coming months I did heaps of research into various units both by reading any article I could lay my hand on as well as searching the net. In fact, Falco builder David Carroll has info on a Trutrak AP in his entry in the Falco Workshop at www.SeqAir.com. The net probably was the best source of info, for it not only lets you read the manufacturers’ claims, it also gives plenty of homebuilders’ thoughts and experiences with different brands. A friend of mine had fitted a Navaid A/P into his RV6 and was fairly happy with it. Since this was my first bit of info, and it was positive, I admit I leaned that way. When lots of articles started appearing on the web by people pulling out Navaids and putting in Trutrak in all different types of homebuilts, I decided to look much deeper.
There is no doubt in my mind that the Trutrak range of auto pilots is by far the best affordable unit available on the market today. They have a large range depending on the size of your cheque book. The top of the range are definitely out of my reach. Their website (www.trutrakap.com) will detail all of the units available far better than I could ever do.
The model that we ended up putting in was the Digiflight 11 VS which basically means it is capable of being a wing leveller with altitude hold as well having the ability to dial in a rate of climb or descent in multiples of 100 feet per minute. The unit will track to a GPS heading or flight plan better than I can hold by hand, or if you want it will track to a heading from its internal source of magnetic information.
As soon as you turn it on the Trutrak will be in the lateral mode, and it will be synchronized to the direction being flown. The main knob is used to dial the heading in that you want and presto the Falco just gently rolls over to pick up this heading. The amount of roll, as well as other parameters can be adjusted to your liking in the set-up stage.
What is even easier is to bring up on the GPS the town or flight plan that you want and as soon as you press “go to” the autopilot takes over. If the GPS was already showing an active waypoint but you were flying by hand and let your concentration slip a little and had drifted off course a bit, let’s say three miles off to the left, (O.K. I daydream whilst I fly) and then you engage the AP with the GPS info, the Falco will roll to the right and track towards the original line from where the GPS was activated to the town, pick up this line and then roll onto that heading with a bit of overshoot each time it intersects the line.
I was surprised the first few times we did this for we expected it just to fly direct to the town from the point of activation. It’s obvious when you re-read the book and think about it all, but a surprise all the same. Again all this is available on their web site.
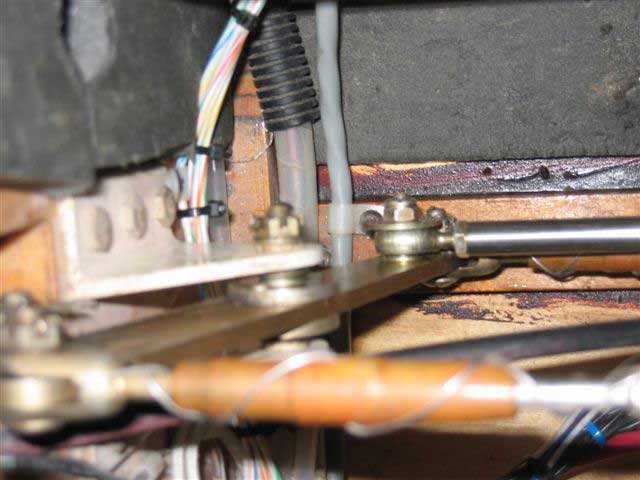
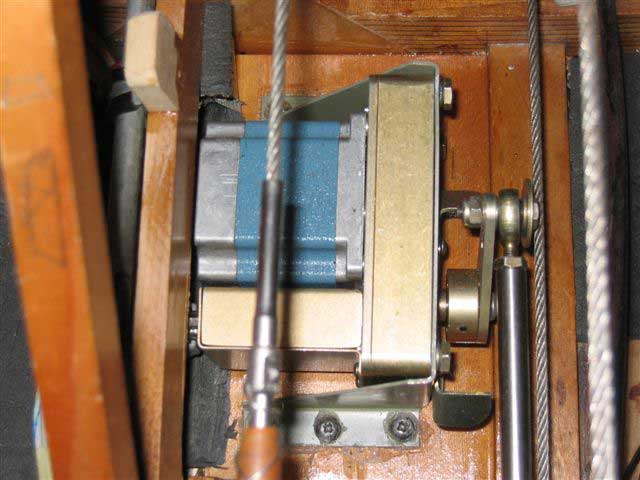
The installation of the Trutrak was relatively easy, but the manual assumed that I knew more than I actually did. Because there hasn’t been heaps sold to Falco owners as yet, as compared to RVs, the info is not aircraft specific nor is the kit that is supplied. The kit comprised of the panel-mounted unit itself, one aileron servo, one pitch servo, two push rods of different lengths, two mounting brackets, two travel limit mechanical stops to stop over-centre lock up of the push rods, and four rod-end bearings, but is very shy in the supply of nuts and bolts. These you have to measure and supply yourself.