Luigi Aldini
![]()
Luigi Aldini |
|
|
What we found to be the best solution at the problem: with the help of a professional woodworker we tapered in dimension the forward and aft faces of the spar (should better say the two booms because we gave the dihedral to the booms first). He found out this very good method: with a portable saw he cut the right angle using a wood straight ruler as a guide, and after five hours of precision sawing we had in the table two booms that started looking like a spar, weighing nearly half. We had then to taper the inner face of both the booms, and with the help of horses we did it using a power plane. |
|
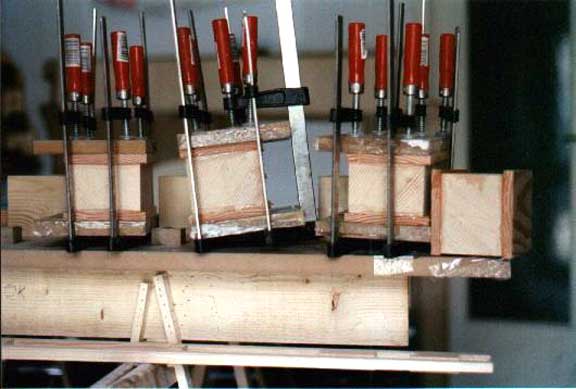
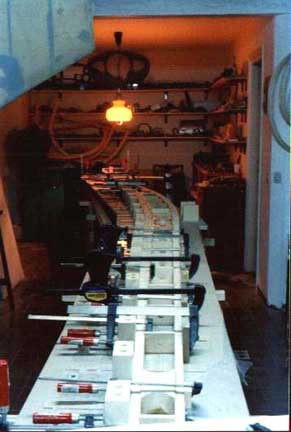
Preparation for the final gluing up: these are the big wood blocks in the center part of the spar. |
|
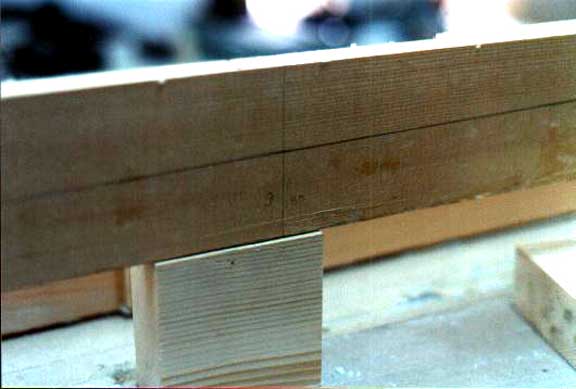
Tapering in height. First step is locating the cut line -- look how much wood you have to cut! |
|
The spar now is a real one! The last process consists in preparing and gluing the plywood webs. We used for the plywood the up-and-in method, according to the manual. The plywood was cut in a bigger size to work without the problem of messing everything up. Then we made the scarfs joints, and we had two big pieces of plywood each face, leaving the central junction to be glued afterward. Then we signed all the faces of the webs using alignment nails. Try not to use big nails neither drill the spar for them. Gluing up was done with the help of few nails and on the jig, to correct the errors of the spar, clampig from both sides. Then we masked the internal face of the glued web and the still-to-glue one. After havig completed the joints the only thing to do was trimming the plywood at the same size of the spar and we used a milling machine for the purpose that saved us a lot of time. We used the same machine to do all the bigger holes on both sides of the spar and then, we finally could start to follow the manual eliminating the need of a lot of thinking time on how to build and to solve problems. It takes a little of time but when is finished it gives you some satisfaction! |
|
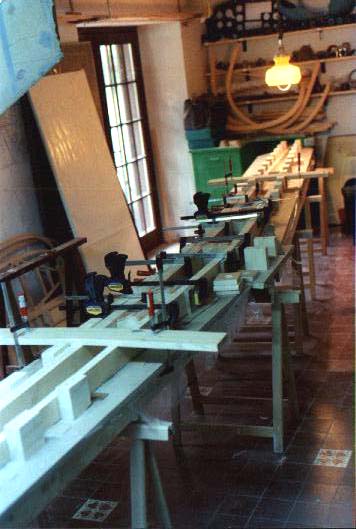
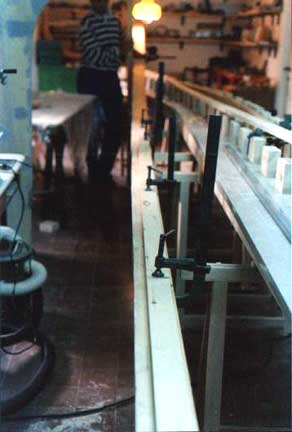
We started from the middle; it's very important to keep the booms parallel, and we used for this a couple of wood axes to keep the booms down; this method is based on the fact that the lower part of the spar is straight. We removed some of the blocks from the jig to allow enough space to insert stiffeners from upside, as suggested by Ing. Frati. In the gluing up we paid a lot of attention about the position of the two side blocks that host main landing gear legs. Starting from center to sides we had no problem; the most important thing is to check always all the dimension, so that you don’t have to the things two times. Important is also to prepare the fore and aft faces for plywood webs, using a straight edge to sand them till matching the good result. This process requires a lot of patience! |
![]()
![]()
|
|
Go back to Luigi Aldini