|
|
When you draw with a pencil, working on the boards, you measure from a line with a ruler, make a tick mark with your pencil, and then draw a line, typically parallel to the first line. When you use WildTools to create a drawing, you use the parallel offset tools for this. The parallel offset capabilities are the best in the business, and they allow you to accurately lay out floor plans and designs with great speed. Click on an object, drag in the direction of the offset and then tab into the Edit window to set the offset on the fly. These tools and the way they work have become the best loved feature of WildTools, and they have a lot to do with the astonishing gains in productivity (typically 25-30%) reported by WildTools users.
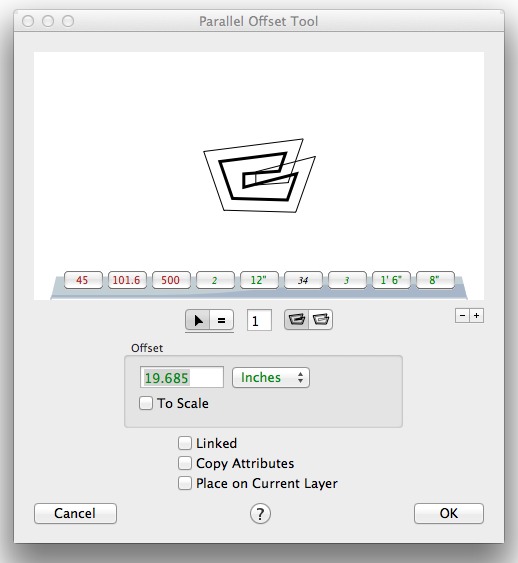
In the tool's dialog, you set the behavior of the tool:
Choose whether the offset will be interactive (arrow) or to a fixed dimension (equal sign). Type the fixed-dimension offset -- the standard PowerCADD math functions and mixed dimensional units may be used. As you will see, you can use this offset even when the tool is operating interactively. This offset is known as the 'active offset'. To the right of the active offset is an additional offset amount (shown as 4" above). This is the 'on-deck' offset, and it provides a second offset that is available at the touch of the Option key while you are using the tool. Only one offset is active at any time, but you can switch the values by clicking on the left-right arrow icon (or on the text of the 'on-deck' offset). As you use the tool, you may press the Option key to toggle between the two offsets. You can now create favorite offsets by clicking on the small 'plus' button below the sample window.
To use the tool, click on an object and then drag away from the object. You may tab into the Edit Window to set the offset on the fly. And we now have a button dock for these favorites that shows at the bottom of the drawing window so you can select your favorite offset with a single click and not visit the tool's dialog.
|

Offset favorites on the button dock in the drawing
One click to change the offset
Reactions from users: Great feature.
For example, this diagram shows what the Thicken tool does to an arc when it creates a filled object. You click on the arc, then drag inward to thicken the radial band. When you release the mouse, the filled object is placed in the drawing.
The Thicken tool is wonderful for created roads, highways or paths from a single curved object.
For example, to use the tool, you can click on the side of a rectangle, move the mouse away, and a new line is created parallel to the face of the rectangle. The offset may be fixed or interactive, and you can tab into the Edit Window on the fly to set the offset as you work.
In the tool's dialog, you set the offset distance, then to use the tool, you click on a line or side of a rectangle or polygon in the drawing, and move the mouse away.
At first it will appear that nothing is happening, but you have to drag at least the distance of the specified offset before any lines begin to show. The farther you drag, the more lines will be created. Release the mouse to complete the operation. The Offset Repeat tool can also be used to draw lines matching a text object in the drawing. This can be used to locate the bounding box of a text object or to create lines for tables.
To do this, you click on the top of a text object, and drag toward the bottom of the text object. A line will be placed at the top of the text object and then additional lines will be placed at offset from the top depending on the height of the text. Continue to drag in the direction of the bottom of the text until you have all of the offset lines that you want. Release the mouse button to complete the operation. |
![]()
Go back to WildTools